Hello everybody, Maurizio here.
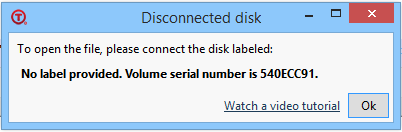
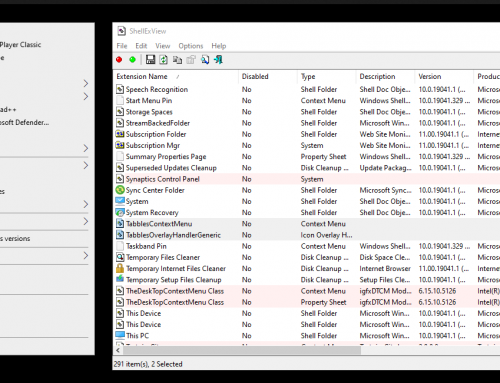
We got a few requests for a how-to on this situation: sometimes, after you replace your hard drive (and therefore copy the files from the old to the new drive), even if you pay attention to preserve the original file paths on the new drive, you see that the files (or the folders) start having this “disconnected” icon:

and if you try to open the files (or the folders), you are asked to insert the old drive, which does not exist anymore:
Why does this happen? Why does Tabbles not know that the files are now on the new drive? And what to do about it? This blog post answers these questions.
First, why does Tabbles not know about it? Well, to be fair, if you had moved your files with Tabbles or with Explorer, everything would be fine, meaning that Tabbles would have detected the move operation, and would have updated its internal paths and disk informations, so it would know that your files are now on the new drive. But since you copied the files to the new drive (or moved them while Tabbles was not installed), Tabbles does not detect the move operation. So it cannot find the files; the disk looks detached to Tabbles.
What is the solution? Unfortunately, for now, there is no point-and-click way to tell Tabbles that a disk has been replaced with another. The solution is to use Sql Server Management Studio to manually run a script. Here are the detailed instructions:
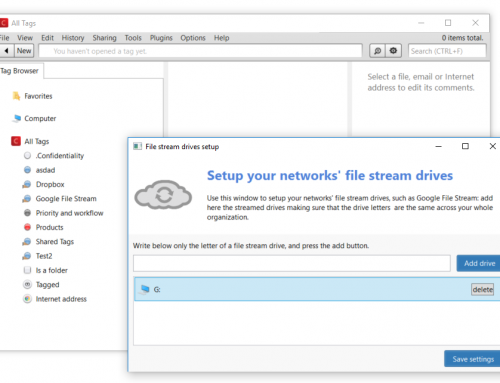
First, (if you are using Tabbles LAN) backup your tabbles.mdf database file, in case you make mistakes and need to restore it later. The location of this file will be something like:
C:/Program Files/Microsoft SQL Server/MSSQL11.SQL2012/MSSQL/DATA/tabbles.mdf
(the actual path depends on where you chose to install Sql Server).
Now we are ready to start.
First, you should take note of the new disk serial number, and the new disk size, as follows:
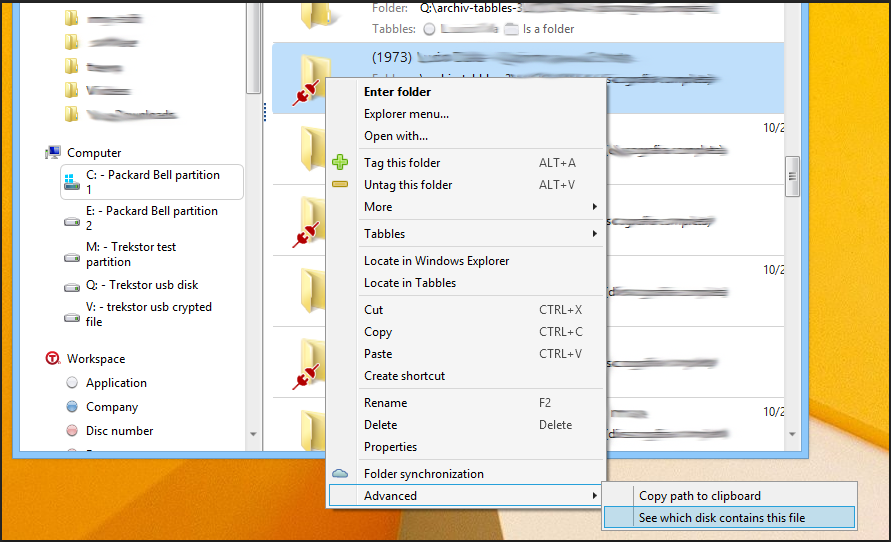
In Tabbles, locate the new drive in the side panel; right-click on the new drive, and choose:
folder menu > advanced > see which disk contains this file

Then a dialog will open, like this:
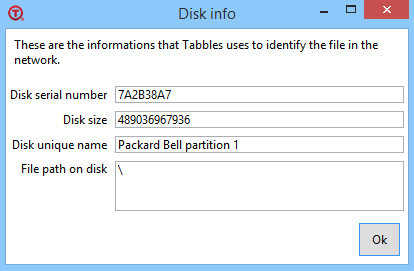
Take note of the disk serial number and disk size. These info are about the new drive (or, more precisely, partition).
Now we need to find the serial number and size of the old disk drive (partition). To do this, locate a file with the “disconnected” icon (by opening a tabble that contains it). Then right click the file itself, and choose “advanced -> see which disk contains this file”:
And take note of serial number and size.
Now you know four values which we will call: OLDSERIAL, NEWSERIAL, OLDSIZE, NEWSIZE.
Now, intuitively speaking, we need to tell Tabbles the following: “Any file on a drive with serial number OLDSERIAL and size OLDSIZE must be changed to have NEWSERIAL and NEWSIZE”.
If you are using Tabbles Cloud, write us at bu**@*****es.net, tell us the four values, and we’ll do the change.
If, on the other hand, you are using Tabbles LAN, do the following:
open Microsoft Sql Server Management Studio:
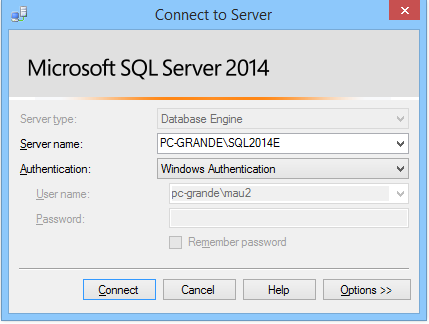
In this login dialog, enter administrator credentials (the same credentials that you used to create the tabbles database in the first place). For that, it will most likely be sufficient to choose “Windows authentication”, if you configured Sql Server so that your Windows user has super-user privileges. Else, you will need to choose sql authentication:
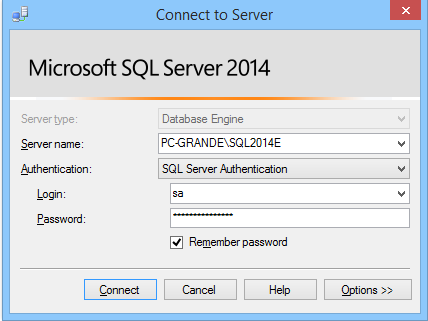
And you will need to write login and password of the super-user, which you defined when you installed sql server.
After login, you need to start a new query with this button:
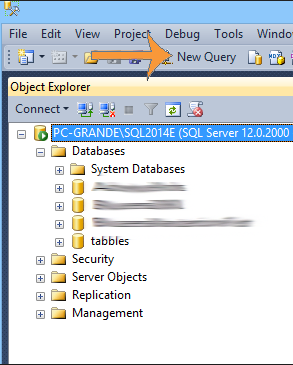
And enter the following script:
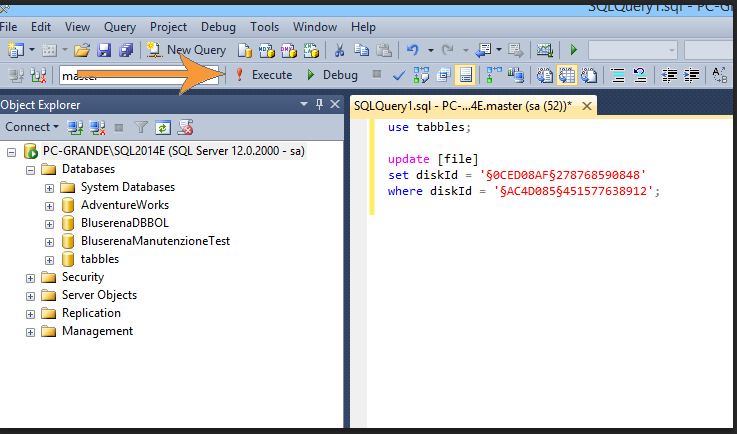
use tabbles;

update [file]
set diskId = '§NEWSERIAL§NEWSIZE'
where diskId = '§OLDSERIAL§OLDSIZE';
Of course, replace NEWSERIAL etc. with the actual values. So the actual query will look like this:
use tabbles;

update [file]
set diskId = '§0CED08AF§278768590848'
where diskId = '§AC4D085§451577638912';
then press the execute button:
And the change will be applied. Now you should no longer see the “disconnected” icon in Tabbles, and be able to open the files once again.
—
I hope this helps. Should you have questions following this tutorial, please feel free to comment here, or in the forum.
There are quite a few how-tos like this that we want to write. See you to the next episode!
Last Saturday I installed the Windows 10 Anniversary Update and a HP Bios update. This resulted in the ‘disconnected-icon’ for all my files in Tabbles. While searching for an explanation I tried the above solution. I found out that one of the updates apparently caused a change in the partition size.
Running the query as described solved the problem, thanks!
Seems to occur also when activating Bitlocker on a drive 🙁
Strange. Yesterday, I started encrypting my F: data disk with Bitlocker. During encryption, I can access the data normally in Windows.
But since I started the encryption, I noticed that Tabbles marks ALL my files with the “no-entry road sign” (shadow files?), although the file exists and is readable on the file system.
Following the above procedure, I find that the OLDSERIAL=NEWSERIAL and OLDSIZE=NEWSIZE.
I just created a new file test.txt on the F: partition, and applied a random Tabble for testing purpose. The tagging operation itself doesn’t complain, but the test.txt file is marked with the “no-entry road sign” again.
Also, in the Tabbles GUI, there is no Tabble/folder structure under the F: tabble: “There are no files in this folder” (I can navigate the C: Tabbles structure just fine).
Any advise on how to fix?
thank you, Maurizio!